Classes
The UML specification contains numerous diagram elements, with a sometimes pervasive inheritance hierarchy. Fortunately, things are much more straightforward in UMLBoard:
We only concentrate on two of the most common classifiers, Classes and Interfaces.
(okay, and maybe Enums will come later at some point).
The two important things to remember about classes are:
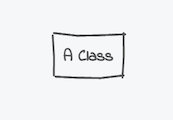
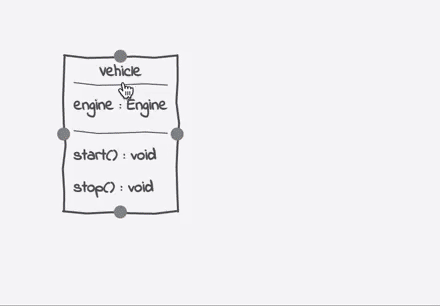
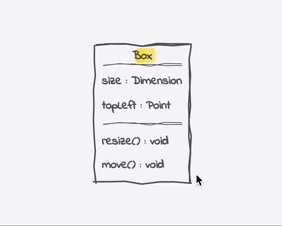
- A class is drawn as a rectangular element with its name in the center. In UMLBoard, a class rectangle will constantly adjust its dimension to its content, so no need for you to take care of that.
- A class can contain a list of features, such as attributes/properties and operations (more on that in the Members section).

Creating
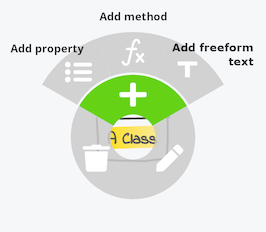
For creating classes, simply open the diagram's context menu by right clicking on an empty space within your diagram and choose the Create Class item (or use the shortcut Cmd + Shift + C ( Ctrl + Shift + C on Windows/Linux).
Your new class is placed directly at your cursor position and starts in edit mode, i.e. you can start right away by typing the class name.
Switching Create Actions
1.5
You can also choose whether you want to instantly create a class or an interface through additional sub-menu items. Press Shift while hovering over the Create Class root entry to easily switch between the available subcommands and execute the desired command directly through the root item.
Double-Click to Create
1.14.1
Starting with v1.14.1, you can also create classes by simply double clicking on an empty space on the board.

Editing
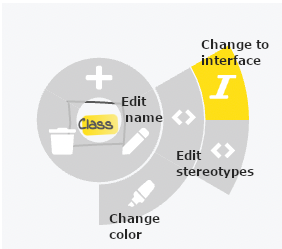
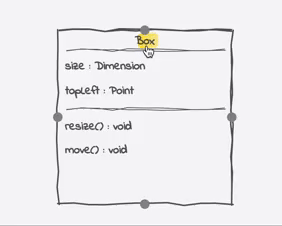
To later edit a class, click inside its rectangle, preferable on its name (but not on one of its features, as they have their own context menu). Use the menu items in the top area to add new features or choose one from the right menu group to edit the class's properties itself.
Name
Editing the class name is also the default menu item (with the pen icon), so you will go right into the class name edit mode when you click on it.
There are currently only two restrictions on the name:
- Every class name must be unique within the diagram.
- The name may not be empty.
You can deactivate the first rule via the UML rule options settings (open the Settings dialog and choose the UML Rules tab). This can be handy if you, for example, want to split a larger class into separate rectangles.
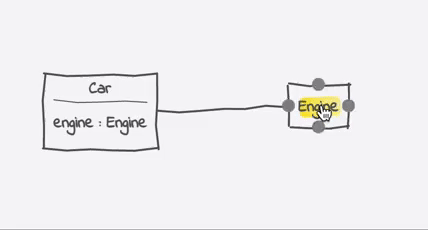
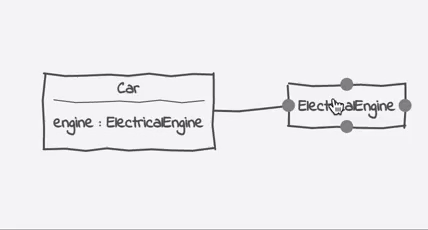
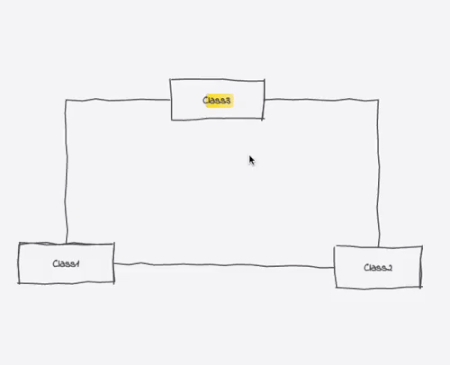
Changing the name also has an additional effect: Each reference to your class will automatically be updated.
For instance, if you have a class called A with an attribute of type B, and you change the name of B, the attribute also gets updated immediately.
Tip
If you want to know more about the relations between classes, please check the Relations section.
By the way, the same also applies to delete operations. Whenever you delete a class referenced somewhere else, UMLBoard will also remove all these references. If you did this accidentally, don't worry, you can always undo any delete operation via Ctrl + Z / Cmd + Z.
Coloring
Painting your classes with individual colors allows you to emphasize specific aspects of your diagram or draw the reader's focus on a particular element.
Interfaces
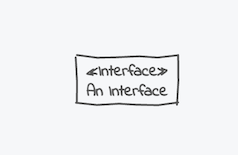
Interfaces are the other essential classifiers available in UMLBoard. In contrast to classifiers, interfaces only define a contract that has to be fulfilled by all classes that implement the interface.
In UMLBoard, interfaces are rendered the same way as classes, but are decorated with an additional stereotype «Interface» above their name.
additional stereotype.
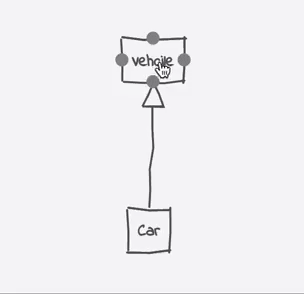
To create an interface, you first have to create a class and then change it to an interface via the corresponding context menu entry, the menu item labeled with the I.
After a class is changed to an interface, its incoming 'extend'-associations are also changed to implementations.
Converting an interface back to class can be done by just selecting the same menu item again.
Note
Some restrictions prevent a class from becoming an interface, e.g., if a class inherits already from another base class, you cannot change its stereotype to an interface.
Abstract classes
1.13
Abstract classes are a classes that cannot be instantiated and serve mainly as base classes to derive more concrete implementation classes. An abstract class can contain abstract methods that don't provide any implementation, but in contrast to interfaces, they can also contain concrete implementations.
In UMLBoard, there are two ways to define an abstract class:
- Mark an existing class directly as abstract by chosing the abstract class wheel item
- Marking any method of a class as abstract/virtual, will automatically make the class abstract too.
UMLBoard renders abstract classes in italic letters.
Stereotypes
1.5
Stereotypes are a convenient way of extending your existing diagram classes with domain-specific roles. By decorating a class with a stereotype, you give your class an additional meaning specific to your use case. UMLBoard already contained a UML-specific stereotype, the Interface annotation you see when declaring a class as an interface. Still, UMLBoard separates its built-in stereotypes from your custom-defined ones. Therefore, you cannot delete or edit the Interface stereotypes, and it is also not shown in your list of custom stereotypes.
Creating and Assigning

To add a new stereotype to a class, you first have to create it. For this, you can either choose the corresponding context menu entry or double click on an existing stereotype (or an Interface declaration) above a classes' name. The stereotype-editor works similar to the one used for property-or method types: Just enter the name of your stereotype, if it does not yet exist, you can choose to create it, and it will automatically be assigned to your class. You can create as many stereotypes as you like and assign as many to a class. To set an existing stereotype to a class, choose it from the combo box list and click on it or press Enter. Just click somewhere outside the dialog or press Enter again to finish your editing. All your changes will be applied to your class, and the dialog will be closed. To cancel your editing, just press Esc instead.
Removing and Deleting
Pressing the little x next to an assigned stereotype item will remove it from your class, but it will still be available through the combo box list.
If you want to delete a stereotype for good, choose the small 'delete' command next to the name in the combo box.
Please note that the delete button is only available if your type was not newly created. Newly created types that are not assigned to your class will automatically be deleted when you close the dialog.
Keep in mind that deleting a stereotype will automatically remove it from all classes to which it was assigned (but don't worry, you can always undo this operation).
Stereotype Editing Dialog
1.13
All stereotypes of your diagram can also be managed through a dialog. Open the dialog by pressing Shift + Cmd + T (Shift + Ctrl T for Windows/Linux) or by clicking on the edit link next to a stereotype entry in the combobox.
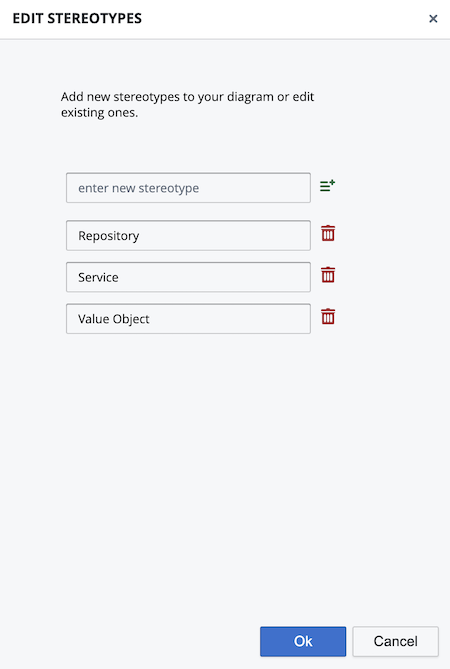
The dialog lets you define new stereotypes, or edit or remove existing ones from your diagram. Note that if you choose to delete a stereotype, it will automatically be removed from all classes to which it was assigned.
Manual Resizing
1.6
By default, a class will always take the width and height it needs to place all its content (name, stereotypes, and members) into its surrounding rectangle. While this might be sufficient for most use cases, there might also be some occasions where a class needs a custom width or height, e.g., if you want to align several classes or emphasize the importance of a specific class within your diagram. You can now adjust the dimensions of a class by hovering over its border until the cursor changes its appearance to a horizontal or vertical movement symbol. Now just drag the edge until the class reaches the desired dimension.
Note
Please note that the class will always be large enough to fit its content. If you want to reduce the size of the class further, you will have to remove some of its content.
If you later decide to reset the class's dimension to fit its content, just choose the corresponding action from the context wheel menu.
Auxiliary Lines and Auto-Snapping
1.12, 1.13
You can activate auxiliary lines to align items more easily with their horizontal or vertical neighbouars.
Press Shift Cmd A (Shift Ctrl A on Windows/Linux) to keep the lines active.
Alternatively, pressing and holding Cmd/Ctrl while moving items will automatically snap them to their nearest auxiliary line.
Tips and Tricks
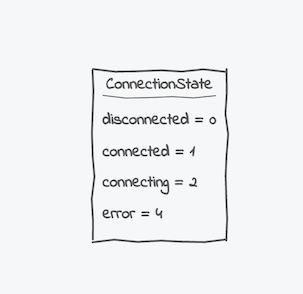
Enums
While UMLBoard does not yet support Enum types1, you can use Freeform text elements to achieve a similar effect. For this, all you have to do is to create a new class that represents your Enum and only add freeform text elements that describe your Enum values.
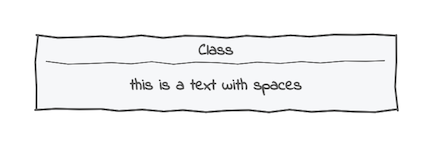
Custom Width
By default, UMLBoard adjusts the width of your class according to its content, but there is a little trick you can use if you need a custom width.
Note: While you can manually adjust the size of a class starting with version 1.6, this method here still describes a good way to center any freeform text within a class (as by default it is always left-aligned2).
Unlike properties, spaces in a freeform text won't get trimmed automatically, so you can just add a freeform text with additional spaces at the beginning and end. Your class will then adjust to the width of this text.